Dyeing Emptied Eggs

Blown out eggs are more difficult to work with than full eggs simply because they’ve been emptied. This causes two problems with dyeing:
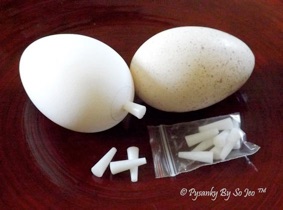
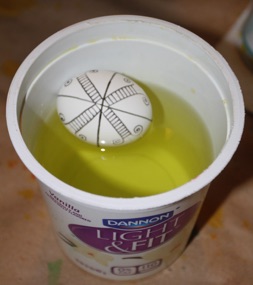
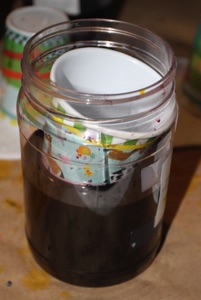
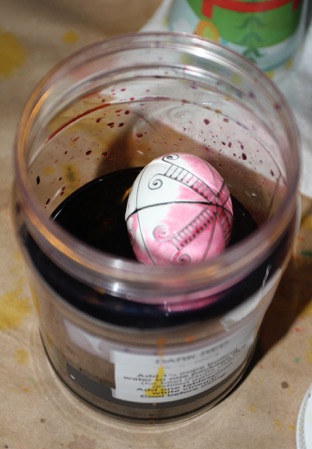
1)The egg wants to float on the dye, as in the photo above
2) The dye can leak into the egg through the drainage hole.
How, then, does one get around these problems and successfully dye such eggs?
Seal the drainage hole. Closing off the hole in the end of the egg will prevent the dye leaking into the egg. Why do we want to prevent this? First of all, it’s messy. What goes in will eventually come out, and dye running out of an egg can cause a mess on your hands, on your work area, on your counters, on your floors, and on the egg itself. Second, dye which gets into the egg can also come out through the pores of the shell, which may be exposed if here has been any break in the inner membrane. This will be extravasated through the pores out onto the shell, causing colored spots.
The hole can be closed simply with a bit of beeswax. Some people roll a bit of wax into a small ball, and then stuff that into the hole. They then seal it in by writing a line of wax around the base of the ball, where it meets the sides of the hole. This will leave a white ring around the hole when the wax is removed at the end, but provides the most reliable seal.
Others use silicone plugs, which are convenient and easy to place. However, plugs can leak if the hole is irregular, and twisting a plug in and out of the hole each time you dye (as is recommended) risks cracking the shell around the hole. This is a silicone plug sold by So Jeo on her Etsy site:
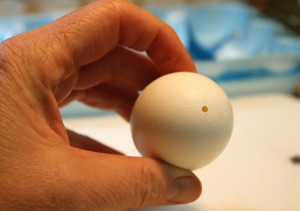
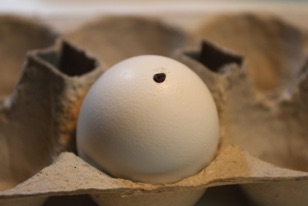
There is a third way, which I sometimes use. I make the drainage holes with a Blas-Fix hand drill so they are small and uniform, like the one in this large chicken egg:
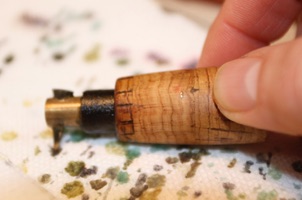
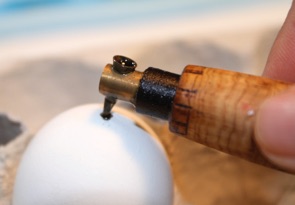
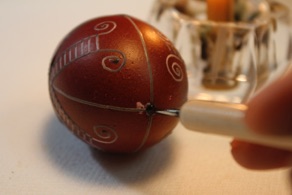
To fill this hole, I take a heavy stylus, fill it with wax, and blot off the excess wax on some paper towel. I then take that stylus, and run it around the edge/rim of the hole, leaving a line of wax:
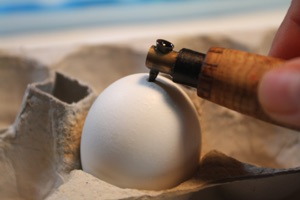
The egg is shown here sitting in a piece of an egg carton. You can also hold in in your non-dominant hand. Keep writing around the edge, building up the wax, until the hole is completely covered over with wax. This will seal the hole:
Some people will write another line around the edge of the plug to provide a tighter seal, and it’s not a bad idea. I find about 10% of eggs sealed this way will leak, which is a real problem if you are using these eggs in a class. Also, make sure the egg is warm; placing hot beeswax into the opening will heat the air inside, causing it to get pushed out through the hole and causing splatter.
Now that the egg is plugged, you can write your design. I prefer to plug first if closing with wax; sometimes you can get a bit of splatter of the hot wax, and it is easier to clean it up off of a blank egg than one with designs on it. (Goof Off or mineral spirits and a sharp blade can usually take care of these bits of stray wax.) Silicone plugs get in your way while working on an egg, so those should be placed just before dyeing he egg.
Weigh down the egg in the dye. Emptied eggs float, as you see. Getting them to stay submerged in the dye, or even the vinegar rinse, is a chore.

Some people have told me they put on a glove and hold the egg in the dye until it is fully dyed. Others use various contraptions, wires and such, to push the egg into the dye and hold it there. I found an easier way when I was in Ukraine a one summer, teaching pysankarstvo at camp.
We had decided to use emptied eggs, so that the children could transport their eggs home safely and then keep them for a long time. One of my friends, Maryna, told me that, at a master class in Kyiv earlier that year, Zoya Stashuk had solved the problem of floating eggs by weighing them down with disposable plastic cups partially filled with water. We had brought sturdy plastic cups to class for use in the painting class, and I took a few sets of these and used them in our pysanka class. They worked like a charms. It was a true eureka moment for me.
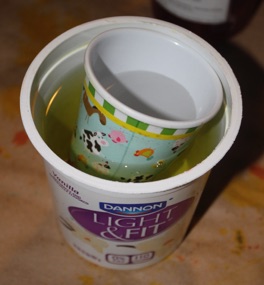
The plastic cups (drinking glasses) should be narrower than the opening of your dye jar, and tall enough that they will protrude from the top of the jar (for easy placement and removal) or at least be even with the top of your jar. I’ve used solid, non-disposable plastic cups like these, which I bought on sale:
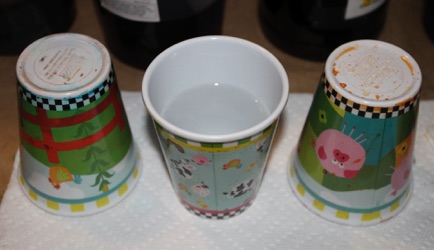
They’re OK, but a taller version works even better, so that is what I now use. The two cups on the sides are drying, and the one in the middle is half filled with water, ready for use.
For classes I use red Solo cups, which are wide and sturdy. I rest them on the jar lids in front of the dye jars, and keep a pitcher nearby to fill them as needed:
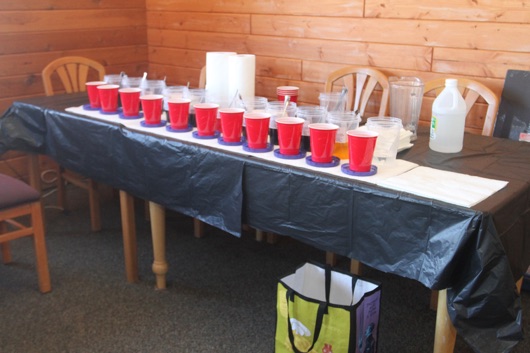
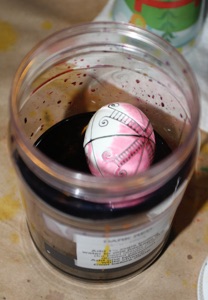
I place the egg gently into the solution (vinegar rinse or dye), spin it around to coat it with the solution, and then gently push it in with the cup. Here my egg is being placed int the vinegar rinse for a bit of acidification:
If the weight is not enough to hold the egg down, I pour a bit more water into the cup. I let the egg soak the usual length of time, and then remove it. In this case, the next step was to place it directly into the dye:
It’s important to spin the egg and coat it with dye, so you don’t get white spots where the cup touches the egg. It’s also useful to turn the egg part way through the dyeing process to avoid uneven dyeing....and light spots.
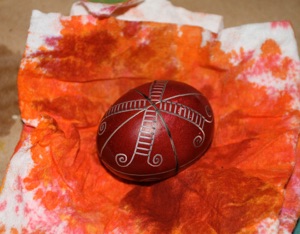
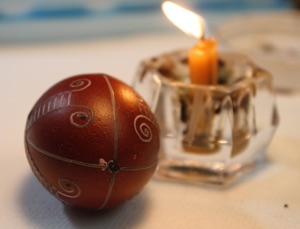
Once the egg has reached the color you desire, remove the cup, and then remove the egg from the dye with a spoon. Pat it dry with a piece of paper towel. You can see below, in the photo on the right, that our seal has held.
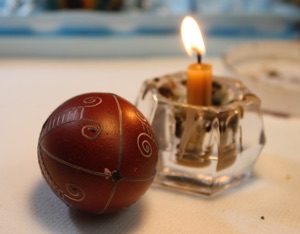
If this were a multicolored pysanka, you would repeat the writing and dyeing process several times. Since it’s not, I am now ready to remove the wax.
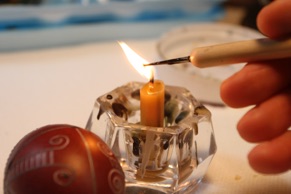
First I need to open the drainage hole; if I don’t, heated air inside the egg will force the wax plug out while I am cleaning, which can be messy (especially if any dye has leaked in) and can cause the pysanka to EXPLODE if there are any weak spots or small cracks in the shell. I heat a drop-pull tool, and insert it into the plug, melting it open:
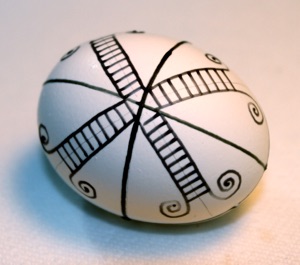
The hole is now opened (see pysanka below), and the wax can be removed in the usual fashion:


Back to Main Dyeing page
Back to Main Pysankarstvo page
Search my site with Google
The Incredible Lightness of Being (Empty)

