Varnishing

You may wish to apply a glossy (or satin) finish to your pysanka once it is completed. Varnishing has two principle reasons: aesthetic and protective. Most people find eggs with a shiny or satin finish to be more attractive. The varnish will protect the eggs from water damage (the dyes will run if the pysanka shell becomes damp or any droplets of water fall on it) and strengthen the shell
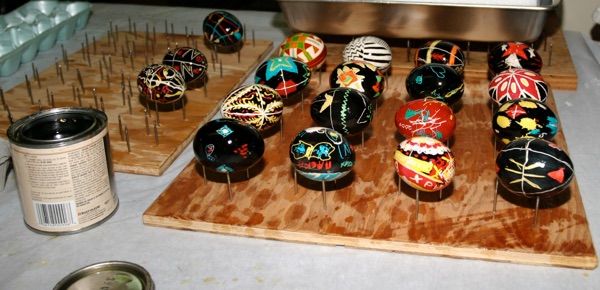
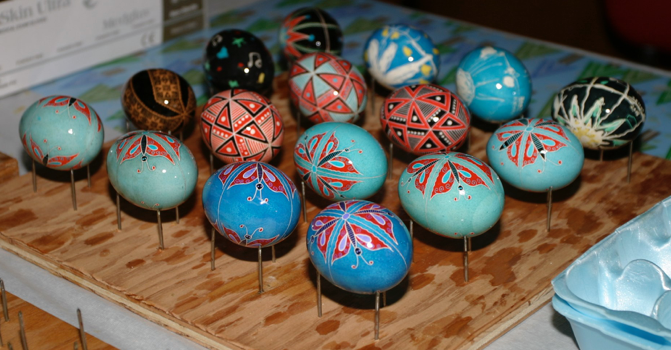
I use clear gloss urethane (oil-based), a synthetic varnish, and have a small card table I use as a varnishing and drying table. It is covered with a cheap plastic table cover to protect it from the varnish. Here you see the eggs from my Ukrainian school class ready for varnishing:
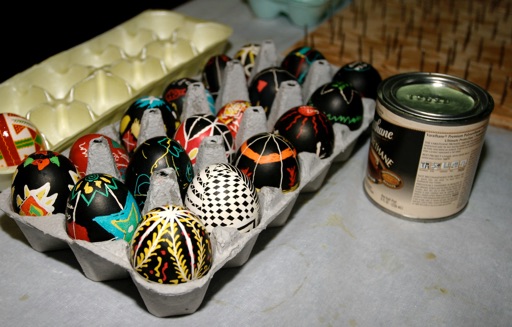
Eggs ready for varnishing
Also open the varnish can and inspect the varnish. It should be thin and runny; thick yellow varnish will not apply as evenly as thin, is more likely to develop runs and thick spots, and is likely to dry yellow. This is why I prefer small cans of varnish – although they seem more expensive initially, they are cheaper in the long run because you do not end up throwing out half of the can because it’s gotten too thick and the seal on the jar is no longer any good.
There are many methods of applying varnishes; on this page I will discuss two methods appropriate for apply gloss polyurethane varnish. Some specialty varnishes can only be applied by brush or dipping, neither of which methods I discuss here.
For either of these methods you will need to wear gloves. I use medium non-sterile vinyl or nitrile gloves (men should generally wear a large glove, and young children might need a small). Gloves aren’t absolutely necessary, but getting varnish off of your hands can be brutally difficult and hard on the skin. I prefer to protect my hands rather than worry about cleaning and moisturizing them afterwards.
DO NOT use latex gloves – the latex breaks down in the varnish, and may contaminate the varnish and cause it to dry poorly and/or greatly prolong dying times. Apparently this is also try of “nitryl” gloves. Beware!
TRADITIONAL VARNISHING: I apply varnish with my gloved hands. To apply the varnish, I dip a finger into the varnish, and dribble it into the palm of my hand.
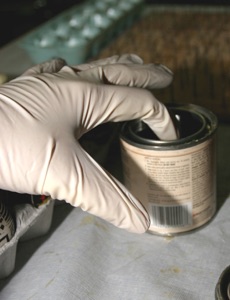
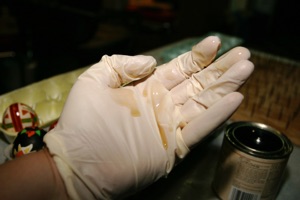
Dipping a finger into the varnish (left) and then putting the varnish into the palm of my hand (right)
I then pick up an egg, and roll it around in the palm of my hand. I generally use one hand for picking up and placing in the rack (my right) , and the other for rolling around. You should wear gloves on both hands if you do this. (The photos show my left hand because my right was holding the camera.)
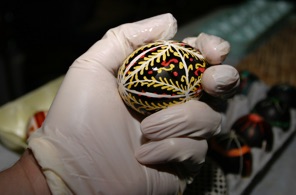
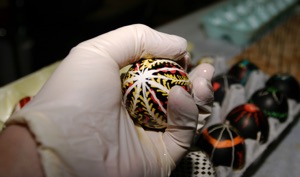
Applying a nice, even, thin coat of varnish
Once the egg is evenly – but not thickly – coated, I place it on a drying rack. Remember, it is better to do a second coat...and even third one...to get a nice glossy finish, rather than apply the varnish was too thickly and end up with a pysanka covered with bumps and drips!
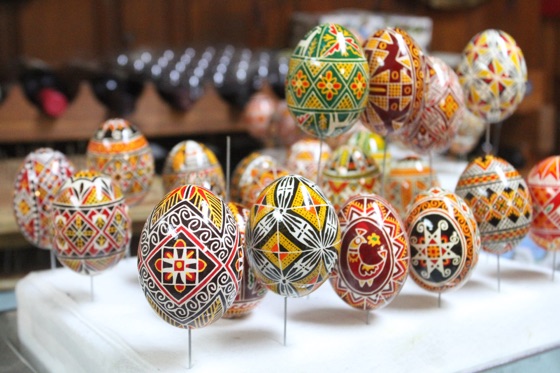
Here you can see an example of pysanky on a nail-type drying rack, the sort I use for full eggs:
Newly varnished pysanky on the drying rack
Emptied pysanky can be dried on a wire rack. You can read about the different types of racks on the next page.
It usually takes at least 24 hours for the varnish to dry completely–longer if the air is damp, as in the summer, but often much more quickly when the air is dry, as in the winter. (I can sometimes varnish two batches of eggs in a day.) Leave the eggs on the drying rack until they are NO LONGER STICKY to touch. If you remove them too soon, and place them in an egg carton, they will stick to the carton.
CAVEAT: Once you have varnished a full egg pysanka, you must decide whether to leave the egg intact, or empty out its contents. The varnish seals the egg’s shell, making it difficult, if not impossible, for the egg to dry out as it would normally. Eggs which have not been emptied may, if they have small cracks, leak or, if they don’t, explode. Neither is pleasant, and can be downright disgusting.
If you don’t wish to empty the eggs, you probably should not varnish them, to decrease the probability of explosion. The contents will dry up over time.
“VARNISH & SPIN”: John at All Things Ukrainian demonstrates a “spin dry” method of varnishing on his site. He dips a pysanka into varnish, and then puts it on a special rack and spins the egg to remove excess varnish. He uses a modified coat hanger for this process to produce a single egg rack.
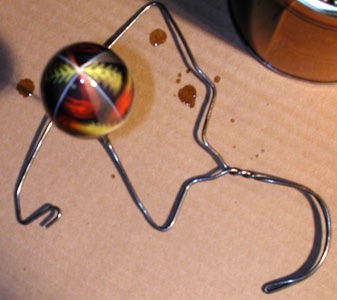
You can go to his site here.
I haven’t tried this method, but it should work quite well. I usually varnish a bunch of eggs as once, and this method is more for those who do an egg at a time (although John tells me you can simply create a bunch of these racks–wire hangers are ubiquitous and free–and then varnish a bunch of eggs).


Back to Main Finishing page
Back to Main Pysankarstvo page
Search my site with Google
Varnishing Pysanky