Snowflake Pysanka
Step-by-Step: Wax
Snowflake Pysanka
Step-by-Step: Wax

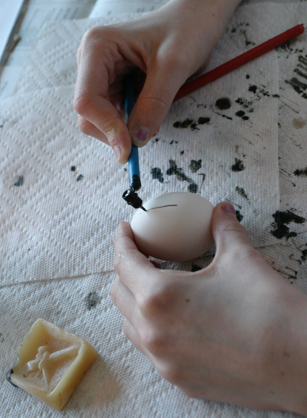
I do not usually plan out my snowflakes in advance––I simply improvise the designs as I go along. By making a design in one section, and then repeating it in the others, I build up a snowflake. Once you have drawn your concentric circles on an egg in pencil, and divided the circle into twelve wedges, you are ready to begin waxing.
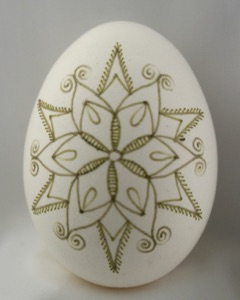
I begin by drawing a small “flower” at the very center. This will be the center of the pysanka, and the rest of the design will grow from here. I use a fine stylus for drawing all the outlines.
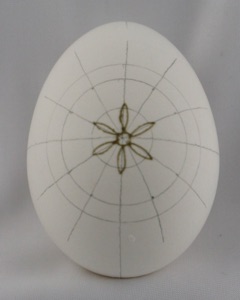
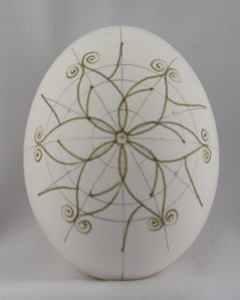
Once the central design is done, I draw out from the tips to either the second or third circle. This design, whether a spiral like on the egg shown here, or a simpler arc or line, should go from the tip of the central flower across to the next division line. I then repeat the same design from the tip of each “petal” of the flower:
Now I draw the mirror image from each tip to the opposite line:
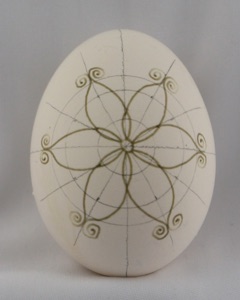
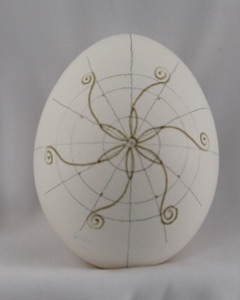
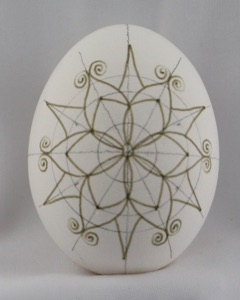
Now we need to add a few more design elements. Here I’ve drawn a simple arc from each tip of the central flower to the second line/circle (inside the rounded arm); this will give me a design within the rounded arm. I then draw a second arc from the second line out to each dividing line; this will, once mirrored, create a second, sharper point/arm on the snowflake.
As before, I now draw the mirror image lines:
Now that I have a basic outline drawn, I will remove the pencil lines. It is very important, especially if you are planning a a relatively light final color (i.e. anything besides black or royal blue), to remove the pencil marks BEFORE dyeing. I like to remove them after the basic design is drawn in, but before I start coloring in large areas of white, or adding lots of fine details.
There are several ways to accomplish this, but, in my opinion, the simplest and best way is to simply wash the pencil marks off. I use Goof Off wipes, and just rub the marks right off. The wipes do not seem to affect dyeing, and do not remove wax. You could also wash the pencil lines off with a little bit of Ivory liquid and water.
(Don’t forget the vinegar rinse before dyeing, so that the shell will be properly acidified and dye optimally!)
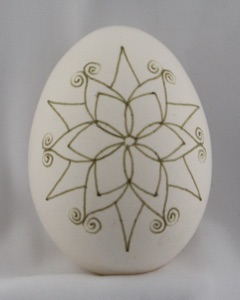
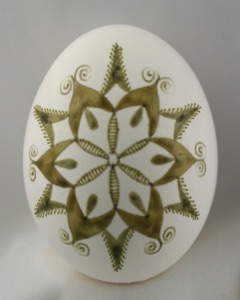
Now I’ll add a second line into the sharp points, creating an arrow-shaped wedge amenable to being colored in, and then I’ll put a teardrop shape into each open area of the main rounded arms. I use a fine stylus for each of these.
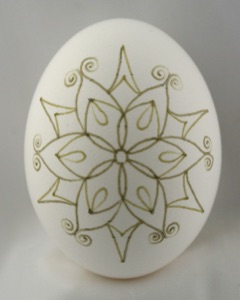
Next I add a few fine details: a “pine-branch” fringe along the edge of the sharp outer points, and striping inside the central flower. I use either a fine or extra-fine stylus for these fine details.
Now I color in those areas of the design which I want to remain white. It is important to color in enough areas to give your snowflake some solidity, but not enough to detract from its lace-like beauty. I usually use a medium stylus to do the coloring in, because of all the narrow angles and crevices.
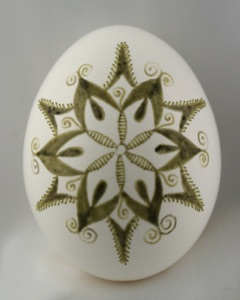
With the basic snowflake completed, it’s time to add in fine details to give it a more filigreed look. I add a small spiral into the open space in each of the sharp points. These spirals take practice, and can be a bit difficult for a beginner. When I make them I move the stylus while turning the egg very slightly. I use a fine stylus.
Now I add in additional fine details, mostly dots and fine lines. First I add dots, using a wide (or better yet, and extra-wide) stylus. On this egg I’ve added a large dot at the end of each of the rounded points, and a smaller dot at he center of each spiral. There are smaller dots in the center circle, around the center circle, next to each teardrop, and in each sharp point above the spiral.
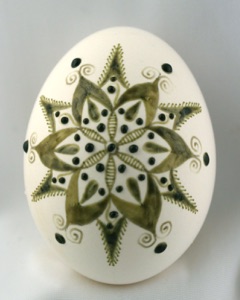
Finally I add lines with an extra-fine stylus, anchoring the dots to the body of the snowflake:
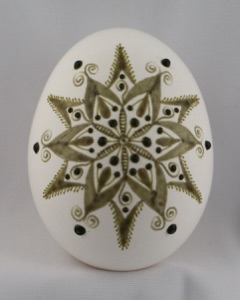
The result is an egg ready for dyeing, a snowflake in situ. (To see what this snowflake looks like finished, go here.)
Back to MAIN My Pysanky page.
Back to MAIN Snowflake Pysanky page.
Search my site with Google
Applying Wax