Setting Up:
Dye Table
Setting Up:
Dye Table

Having a well organized and well run dyeing table makes teaching a class much simpler and less nerve-racking. Setting one up, luckily, is not particularly difficult. It comes down to adequate preparation.
Gathering your supplies
As noted before, gather all of your supplies in advance and, if you are going to be teaching away from home, pack them into a sturdy container. I use those large plastic storage totes you can buy at most discount stores. The ones with clear plastic sides are nice, as you can glance and see what is inside. Good, solid handles are nice, for easier carrying.
I keep my dyes separate from everything else, as they can sometimes leak and spill. Putting a layer of newspaper or paper towel in the bottom of the box will make clean-up easier should a spill occur, and will contain a spill somewhat.
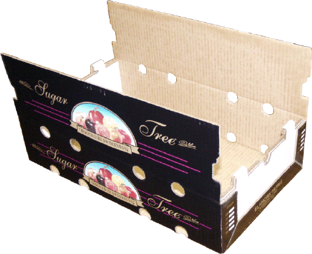
Another way of storing and carrying dyes is to do what my sister-in-law does and keep them in a fruit box, of the sort you can pick up at a fruit market or Costco–a heavy cardboard box, preferably with with cut-out handles. As these boxes are fairly short in height, they are easier to carry than a larger tote.
For your dyeing table you will need, minimally, the following items:
 sturdy metal spoons (at least one for each different color, plus one for the vinegar rinse)
dyes (see below)
a jar of vinegar rinse
paper towels
newspapers or a plastic tablecloth
Egg holder/egg carton
Plastic drinking glasses/red Solo cups (if using empty eggs)
Additional items which are handy to have:
vinegar
extra spoons
spoon rinse jar
paper bag (or other receptacle) for used paper towels
Goof-Off wipes
pitcher of water
Q-tips (for spot-dyeing)
Setting up your table
I like to have my dye table at least a short walk away from the work area, space permitting. That way students dyeing their eggs won’t interfere with those writing on them by bumping into them or jiggling their arms or the table. The table should be sturdy, and large enough to hold all your dyes.
I cover the table with a plastic tablecloth; I prefer this to newspapers, as there is less of a chance of spilt dye leaking through to the table and staining it. I will usually place a long strip of paper towels directly under the dyes, to catch drips and spills, and to make clean-up easier.
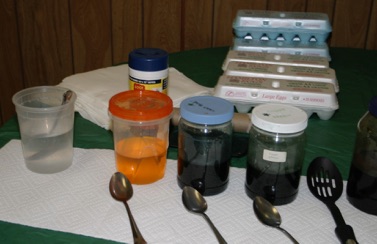
DYES: I place the jars of dyes in a row, in their intended sequence of use, with the jar of vinegar rinse at the far left, and black at the far right. This makes it easier for the students, or designated dyer, to keep the order of dyeing straight. I like to place the lid of each jar directly in front of it, and rest the spoon upon it.
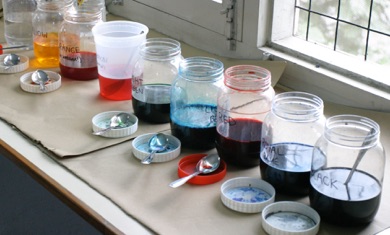
Note the placement of the spoons and lids in front of the dye jars
This not only keeps the spoons from wandering from dye to dye, but also makes the lids easy to find and place on the correct jars when you are done.
If possible, I try to use plastic containers for my dyes–they are lighter, should you have to carry them around, and they are much less likely to break. Additionally, eggs that are dropped a bit less gently than they should be into the dye, or that are knocked against the side of the jar, are less likely to crack in a plastic jar than a glass one. Plastic lids are a must, even on glass jars–the metals will rust.
If it has been a while since the dyes have been used, or if they have had a lot of recent usage, I will add a tablespoon of vinegar to each jar (except UGS orange and the orange rinse, or any others that are vinegar-intolerant). If the class will be large, or I expect a lot of pysanky to be written, I will mix up a new set of dyes on site. This saves the trouble of having to move the dyes large distances. And, after class, the dyes can be given away, thrown out, or taken home, as you wish.
If EMPTY EGGS are being used, they will need to be weighed down in the dye. For this I use plastic drinking glasses. I set a glass in front of each jar, on its lid, and add enough water to it to hold down an egg under the dye. Red Solo cups (as in photo at top of page) are quite good for this, and stack quite well. In Ukraine, as in the photo below, I have these smaller plastic lids that I use for settling the glasses (or cups) on. The actual jar lids get stacked on the back of the table. In either case, I keep a pitcher of water on the table to fill the cups.
EGG HOLDER: If there are a lot of students, I will keep a piece of egg carton in the dyeing area to safely hold eggs either waiting for dye, or done dyeing and waiting for their owners to claim them. I cut the top of a styrofoam egg carton away from the bottom, and trim off the flap. I then simply sit the bottom into the top (for reinforcement), giving me this:
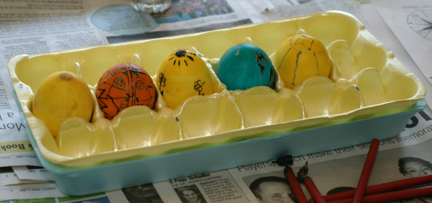
I prefer the 18-egg cartons (above), but a 12 will work just as well. PAPER egg cartons are best for this.
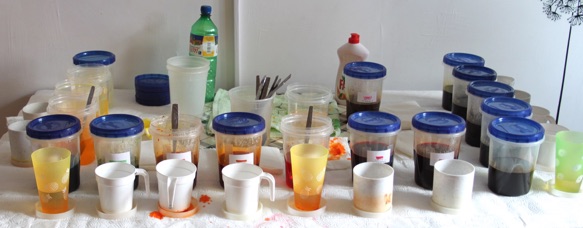
OTHER: If the table is a deep one, I will store the vinegar, extra spoons, paper towel rolls, extra eggs, etc, behind the dyes (see photo below). If not, I place them off to one end.
A extra jar with plain tap water in it can be useful for rinsing off spoons, should they be dipped into the wrong jars (and they will......).
PAPER TOWELS: If you have a small group, you can simply leave a roll of paper towels on the table, and participants can tear off a piece as needed. Usually, though, I will tear off the sheets in advance, fold into quarters, and stack them near the dyes, as above. Less jerky activity and grabbing for things means fewer opportunities for breakage or spillage.
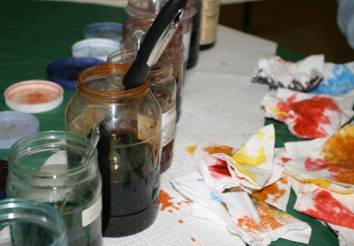
If there is a designated dyer, she can reuse each paper towel several times before it becomes too damp to dry any more. I will often pile up the used paper towels behind the dyes, and grab them as needed, when I am doing the dyeing.
Used paper towels can be reused once they have dried out; I save, sort and reuse my Viva towels, which are thick and sturdy. Others can be useful, once they’ve dried out, for use in wax removal.
GOOF-OFF WIPES: In my classes, if there is a designated dyer, one of her duties is to examine each white egg brought to her and to make sure it has a name and date written on it in wax. If it doesn’t, the student is sent back to write his or her name IN WAX (or at least initials) and the date. I usually take the students’ eggs home after class, clean off the soot and residual wax, and then varnish and empty them. It is absolutely necessary that the pysanky have an ID on them, as students sometimes do not recognize their eggs later on.
Sadly, though, these wipes are no longer being produced or sold; I still have a stash that I use (sparingly), but am looking for a substitute. Any suggestions are welcome.
Once the presence of the name and date has been ascertained, I like the egg to be thoroughly cleaned with a Goof-Off wipe. This removes any remaining pencil lines, and makes the resulting pysanka look much nicer and cleaner. The egg is then dipped in the vinegar rinse, to properly acidify it, and then the first dyebath.
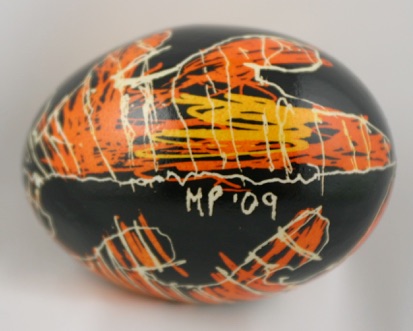
An egg with a proper ID on it (my nephew Matthew’s pysanka)
Back to Main Teaching page
Back to Main Pysankarstvo page
Search my site with Google
Keeping egg coloring simple