Pysanka 9-1-1
Rescuing and Repairing Cracked Eggs
Pysanka 9-1-1
Rescuing and Repairing Cracked Eggs

Eggs Break and Crack
......It’s an unhappy fact of life. You put hours of work into a pysanka only to discover, as you’re finishing, a crack. What to do?
In 2006, I had a lot of problems with broken eggs – not mine so much as those of my students, both those related to me and those not related to me. I had many opportunities to practice rescue and repair. These are the techniques I developed. MORE IMPORTANTLY, since that time, I have switched to using empty eggs when working with children, and this issue has largely gone away.
First, it is important to identify the crack before the wax is removed. When teaching classes, I prefer my students learn the traditional way of wax removal – using a candle flame. Unfortunately, heating an egg with a crack can ruin it. As the egg is held next to the flame, the contents heat up and expand. If the shell is intact, this is not a problem.
If, however, there is a weak spot in the shell – a crack – the expanding egg white will force its way out through the crack. This expands the crack, or even breaks off pieces of the shell. It can be quite explosive! The albumen is water-based, so it will dissolve the dye, ruining the design and finish of the egg. At this point rescuing the egg is pretty difficult. It is better not to reach this point.
Most eggs, except for those that fall and smash to bits (the Humpty-Dumpties), can be saved. Some will have imperceptible scars, while others might have huge, obvious defects*. But an ovoid, decorated object will result.
REMEMBER: Inspect all eggs carefully for cracks before beginning to remove the wax!!!!!!
Cracked, Not Leaking
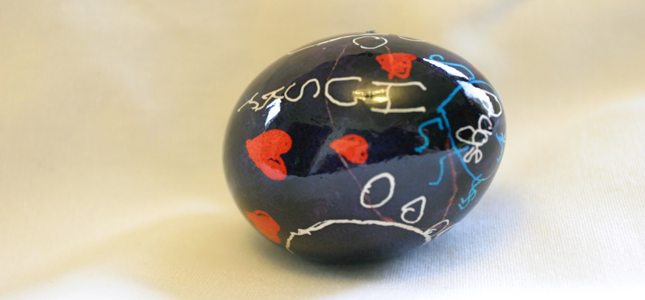
If the crack is caught before wax removal, the inner membrane is often still intact. I set the egg aside. Later, I will carefully remove the wax with Goof Off or another solvents. Then I apply several coats of varnish – at least two, sometimes three or four, depending on the extent of the cracking. This reinforces the shell. The pysanka above had at least three coats.
Once the varnish is completely dry, I will make a small hole in the shell with either a hand drill (the sort that comes with the Blas-fix egg blower), or with my Dremel tool. I try to make the hole as far away from the cracked area as possible.
I empty the egg using a large syringe (at least 20 cc) and a plastic tube (either the one that comes with the Blas-fix or a 16-18 gauge IV catheter). I do so very gently, removing small amounts at a time. I break up the yolk with a long needle to makes its removal easier.
Once the contents of the egg have been largely removed, I instill 5 to 10 cc of water with the syringe, swish it around, and gently remove it. I repeat this until the water runs clear. I place a wick in the hole, and place the egg in my paper egg carton drying rack with the hole end down; this allows the last bits of water to drain out. You can use a simple paper carton to do this. Paper allows the water to wick away from the egg; a styrofoam egg carton will leave the egg standing in a puddle. Water can seep in around the drilled hole and damage the finish.
The pysanka is saved.
Cracked and Leaking
A cracked egg with leakage is an emergency, and needs to be dealt with immediately. The longer the albumen (or yolk) stays on the shell, the more damage will occur to the finish.
I gently pat and wipe the egg as dry and clean as I can with tissue (Kleenex) or paper towels. DO NOT WASH WITH WATER!!! If there was only a small amount of leakage, which has ceased, I then set the egg aside and continue as above.
If the egg is widely cracked open with a lot of leakage, immediate drainage is necessary. If the crack is wide enough, I put the end of the plastic catheter in through the crack and drain out the contents. I can then instill some water and rinse a bit. I drain as before.
If the egg has a tight crack, I will drill a small hole, and then suction out the contents and rinse and drain, as above.
Goo-Gone, a citrus oil cleaner, vaseline or a light oil can be placed around the area of the hole (before or after drilling) to decrease splatter onto the shell, as the white and yolk will remove dye where they touch. Even a ring or big blob of beeswax applied with the stylus can help in this. Goo-Gone has the advantage of evaporating by itself, rather than having to be cleaned off.
DO NOT use a Blas-fix or similar bellows to blow the contents out of a cracked egg. This only increases the pressure within the egg, leading to worsened cracking, worsened leakage, and possible explosion. It doesn’t work at all with eggs that have open cracks.
Once the egg has dried out, it is safe to varnish. As with the non-leaking but cracked pysanky, put several coats of varnish on to reinforce the eggshell.
Other People’s Eggs
If I am in a situation where I can’t work on the cracked egg later (a children’s workshop, for example, or at camp in Ukraine), immediate drainage is necessary, even if there is no leakage. If the crack is wide enough, I put the end of the plastic catheter in through the crack and drain out the contents. I can then instill some water with the same syringe and rinse bit by bit.
If the egg is not leaking, or has a tightly closed crack, I will drill a small hole away from the crack (protecting the shell as above), and then suction out the contents and rinse, as above. I will seal up the drill hole with beeswax (applied with the stylus) for transit.
Instructions are given to let the egg drain and dry out thoroughly (removing the wax plug if necessary) once it arrives home, particularly if it is was badly cracked and leaking. Instructions are given to to let it dry out naturally if the crack was only through the shell and not the membranes, and had no leakage. (At camp I tell them just to leave it sealed, for it may be a week or more before they arrive home.)
As before, DO NOT use a Blas-fix or similar bellows to blow the contents out of a cracked egg.
Instructions can be given for varnishing, but most first time pysanka-makers won’t go to the expense and bother for just one egg. Other possibilities for enhancing the finish are clear nail polish, or even a coating of vegetable oil (or duck or goose fat for those who want to be authentic). In any case, no permanent finish should be applied until the inside of the egg has dried out COMPLETELY.
_______________
* Why would anyone want to save an egg only to have it end up with large defects and scars? Not everyone does. But parents or a child may wish to save a child’s first pysanka; there may be an interesting pattern or color combination you wish to save so you can try it again later. Triage is important. Once the insides have been removed, assess the shell for damage and decide if it is worth going forward.
Back to Main Troubleshooting page
Back to Main Pysankarstvo page
Search my site with Google
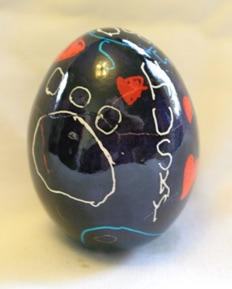
A badly cracked pysanka that was saved