Preparing Dyes

Preparing commercially sold pysanka dyes is not rocket science, nor is it brain surgery. It is quite simple, and generally consists of following the directions on the packet: place dye powder in jar, add boiling water, stir, add vinegar. That really is pretty much all there is to it.
But a few suggestions are in order, and can make the process simpler, safer, and less messy.
When preparing commercial pysanka dyes:
1. Follow the directions! Pay attention to the amount of water called for in the directions, and whether or not the dye calls for vinegar (or other acid, like setting powder/citric acid). Most dye packets have been pre-measured to be mixed with about 1 to 1.5 cups of water.
2.Use boiling hot water. The dye powder will dissolve more readily if the water is boiling hot. Some Ukrainian dye packets only call for warm water, but, as all the chemical dyes sold for pysanky are acid/aniline dyes, they will benefit from being dissolved in boiling hot water.
I find an electric kettle to be perfect for boiling water. It can be used anywhere, and usually has an auto shut off.3.Use the correct amount of water for your dye jar. Make sure you can fit the dye solution and an egg into the jar at the same time without spillage. This is only a concern if you are using some odd-sized or unusually small jars. Most pint jars can accommodate 1 to 1.5 cups of dye and a chicken egg simultaneously, without spilling. Check beforehand with water and an egg if you are uncertain.
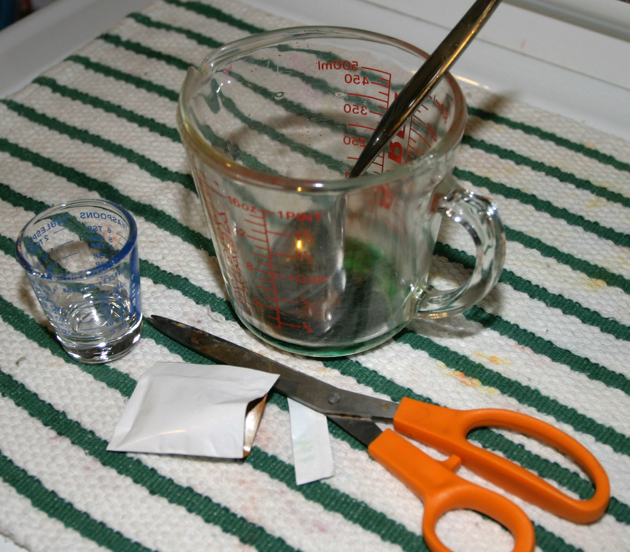
If you have unusually large dye containers, make sure there will be enough solution to completely cover the egg. If not, you may wish to make a double batch (two packets of dye powder) of dye solution. The egg dyes best if fully immersed.4.Be careful when opening the dye packets. Aniline dyes are not toxic in solution, but are an irritant and a toxin in the powdered form. I shake the packet to knock the dye powder down to one end, and then carefully cut open the other end with scissors.
5.Mix up the dyes in an appropriate container. Use either a tempered glass container (like the measuring cup above or canning jars) or a plastic container that can tolerate the heat (Type 5 plastic). Glass jars that are not tempered can crack from the heat, and the wrong kind of plastic can melt and deform.
It is better to mix up the dye in a Pyrex container, and then decant it into your glass jars later, when the dye has cooled, than to risk the glass shattering and the hot dye pouring out everywhere. Make sure to check any glass jars for cracks prior to using for mixing or storage.6.Add the water to the dye, not the dye powder to the water. Place the powder into the bottom of the container (as in photo above), and then slowly pour in the hot water.
7.Stir the hot dye solution with a metal spoon. Do not use plastic spoons–they will often melt.
8.Add vinegar if called for. Check the individual dye packet to see if the dye requires vinegar. Some dyes, like UGS orange, are incompatible with vinegar. The vinegar can be added at any time, but I like to add it right after mixing so that I don’t forget. I use a small shot glass to measure out the vinegar. Exact amounts are not that important, as long as you pour in a tablespoon or so of vinegar.
(Pro tip: If you can’t remember if you’ve added vinegar to the dye or not, just smell it. The vinegar has an acrid, distinctive smell that plain dyes don’t.)9.Label your dye jars. Not the lids (although those can be marked, too), but the jars themselves. If you have more than three or four basic dyes, it can be hard to tell the colors apart simply by looking at the dye solutions. MIt is also helpful to note the date the dye was mixed.
10. Let the dyes cool before using. Hot dye will melt the wax. And that is bad.
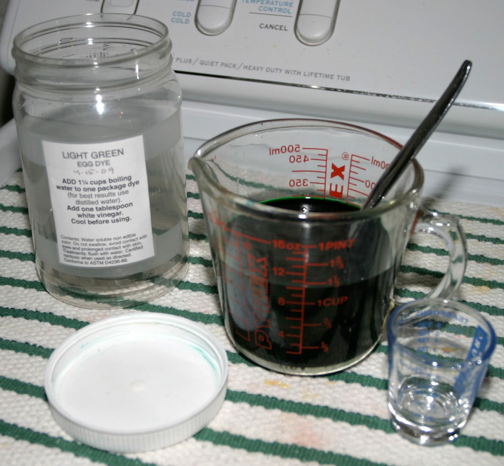
Dye is being mixed in a Pyrex measuring cup, and will later be decanted to the dye jar on the left.
The shot glass is used for adding vinegar.
When preparing other kinds of aniline dyes (e.g. fabric dyes), you will need to experiment a bit. I generally find that about half a teaspoon of wool/silk dye will prepare 1.5 to 2 cups of dye; you may find that a bit less might be sufficient. As before, use boiling water, and then add 1-2 tablespoons of vinegar. Prepare using the precautions above.
Fabric dyes are meant for use in hot water, so you may have problems with them. Some may precipitate out of solution at room temperature; such dyes may simply not be useful for dyeing eggs, others may still dye despite the muddy nature of the solution. Others may just not dye well, or take very long to set. Chemical reactions generally proceed more quickly in a hot environment.
Other dyes may give odd results when used on eggs instead of on wool or silk. The dyeing color charts can give you some idea of what sort of colors to expect, but expect surprises. I found that Jacquard “chestnut” dye was a bluish color on a white egg, and a lovely olive green over yellow.
As for vinegar; most dyes require it. They are, after all, “acid” dyes. If you have bad results with a dye (e.g. precipitating out into a gooey mess), try making a batch without vinegar to see if it makes a difference. If you are using Ukrainian wool dyes, something to keep in mind:
Note: According to the instructions on the smaller pysanka dye packets, DO NOT add vinegar to the orange and yellow dyes. Since the dyes in both sizes appear to be the same, this should apply to all the dyes.


Back to Main Dyes page
Back to Main Pysankarstvo page
Search my site with Google
Home chemistry