Straining Your Dyes

Aniline dyes can accumulate various types of debris over time and with usage. Bits of wax can fall off of pysanky, metal lids can rust, small amounts of mold can grow. All of these can interfere with dyeing (e.g. loose pieces of wax or mold can stick to eggs being dyed). It’s sometimes worth it*, if your dye is getting dirty, to strain it from time to time.
Doing so is quite simple, albeit a bit messy. You need to work in an area without a lot of easily stainable surfaces, or else cover well your work area with newspaper or paper towels. I work in my laundry room--the enamel surface of my washer doesn’t stain, and I have the sink near by for rinsing and washing the jars.
NOTE: if the debris in your jar is granular, it may be dye that has come out of solution (un-dissolved). You might try heating it, either in a small saucepan or the microwave, and then stir to see if the particulate dissolves. If it does, the solution may be too concentrated and just need to be diluted (watered down) a bit. You don’t want to filter out dye from your dye, after all.
(* Keep in mind that dyes are cheap, about $1 US per package. If the dye is full of mold, or smells foul, it’s not really worth it to go to all this trouble to try and save it. Just buy another packet of dye and mix it up. Seriously. Your time is worth something, too.)
To strain dyes, you need three things:
-
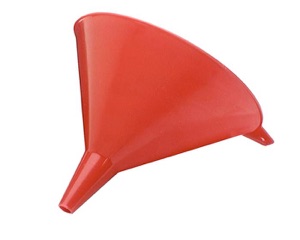
1.A plastic funnel. I bought mine as part of a set of three at the hardware store. I use the largest one of the set.
-
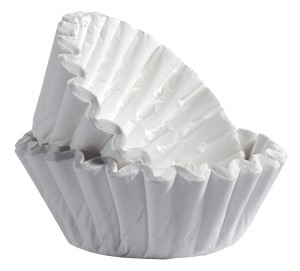
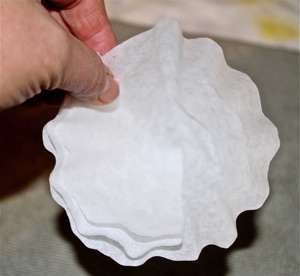
2.Coffee filters. The round, fluted kind are the best. You probably already have some around the house; if not, you can pick them up cheaply from a dollar or discount store. I used to use paper towels in the past, and cut circles out of them, but he coffee filters do a much better job–they absorb less and filter faster.
-
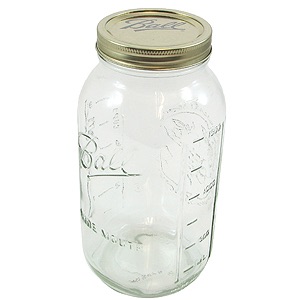
3.A large (quart or half gallon) Mason jar. This is the receptacle you will strain the dye into. You want it to be fairly tall, so that gravity will help you in the straining process, and with a regular sized opening (not the wide mouth type), so the funnel will sit up high and not fall in. The opening of the jar should be significantly narrower than the width of the funnel.
Any jar can be used, but these are my favorites. Gladware plastic containers are nice, but have a wide opening, which means that the funnel sits quite low in them.
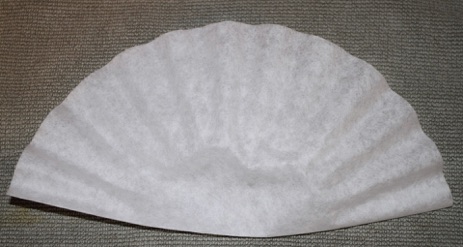
Now that you’ve gathered what you need, and found a place to work, you will need to create your filter and place it in the funnel. This is quite simple. To prepare your filter, flatten a single coffee filter, and take the resulting round piece of filter paper and fold it in half:
.....and then in half again:
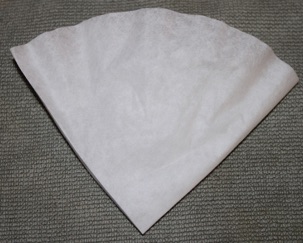
Now take this resulting triangular shaped paper, and open up one of the two pockets you’ve created; this will give you a cone:
Place this cone into the funnel, and you'll find that it will fit perfectly!
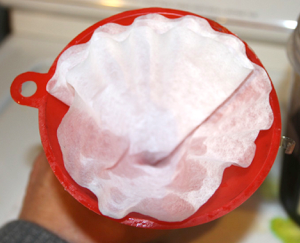
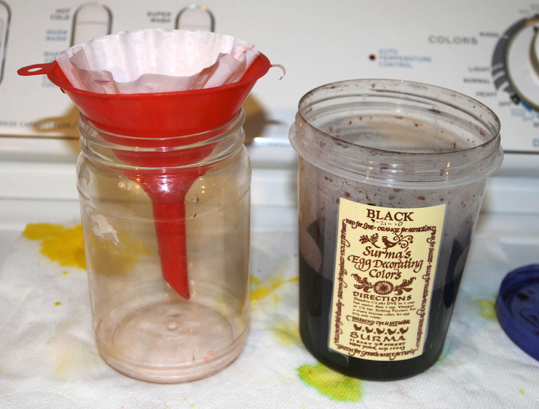
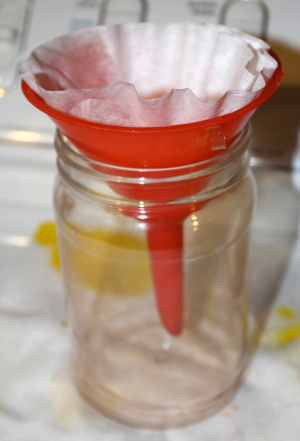
Now place the funnel (with filter paper) into the opening of a tall, clean jar, and you’re ready to start! (Note: a tall jar is not absolutely necessary, but it allows gravity to help speed up the filtering process. Half gallon Mason jars work very well for filtering. The plastic jar in the photo below is not quite a quart.)
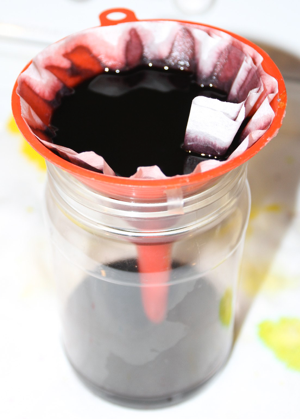
Now carefully pour the dye into the opened section of the filter, making sure you don’t overfill. Make sure the dye stays within the filter paper, and doesn’t overtop it. The entire jar won’t fit at once, so pour in what you can, let it percolate through, and then add the rest later. The speed of the filtering depends on how dirty the dye is, and how much crud is in it. Mold will clog up the filter and slow the process; just give it more time.
Once the dye has filtered through, remove the funnel+filter. Discard the filter paper, and wash the funnel thoroughly with dish detergent. If there was any mold, bleach the funnel, too. (I spray with Clorox spray cleanser with bleach.)
If there was any mold in the dye, it's worth filtering it a second time, rather than just simply pouring the dye back into the original jar (or the one you will be heating the dye in). Repeat as above with filter paper, etc. Mold is difficult to get rid of!
REMEMBER: WASH your jar and lid while the dye is filtering. Thoroughly wash out your dye jar with dish detergent. Scrub it clean, and the lid, too. If there was any mold in the jar, use bleach (or a bleach-based spray cleaner) to disinfect the jar. You want to kill any remaining mold/bacteria/spores; if you don’t the problem will recur. Dry the jar.


Back to Main Dyes page
Back to Main Pysankarstvo page
Search my site with Google
Cleaning up your dyes