Dyeing
Procedures
Dyeing
Procedures

After you have applied your wax, double check your egg (and the pattern) to make sure you didn't miss any lines and that all areas that need to be have been colored in fully. Once you have checked, dip it in the next dye stated.
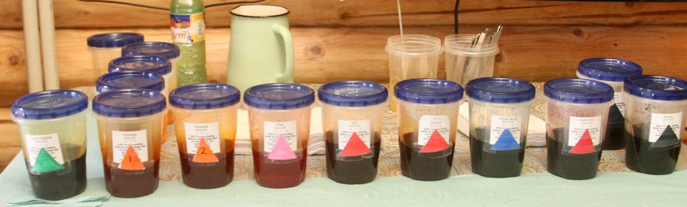
Dyes that are old may have grown weak from frequent use, or the vinegar may have evaporated out. You should always date your dyes when preparing them, like the jar of pink below:

If the jar has been made recently, go ahead and use it. If it is an older jar, and hasn’t been used recently, check it before using for mold1 or precipitates2 (if either is present, do not use). If it’s been a while since the jar was made/used, it might be worthwhile to add a tablespoon or two of white vinegar to it before using.
Once the dye is ready, lower the egg gently into the jar with a large metal tablespoon. Avoid cheap plastic spoons, as they can break or bend–in either case, dropping and perhaps breaking the egg.
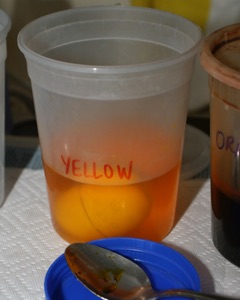
Leave the egg in about 1 to 5 minutes, or until it is the desired color.
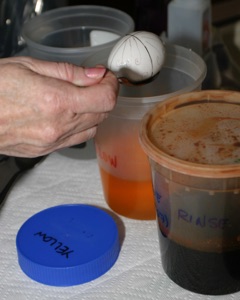
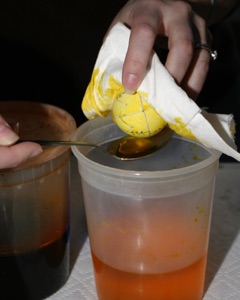
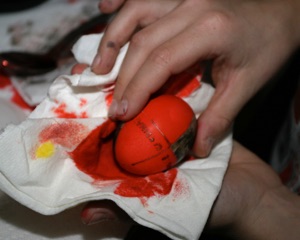
Remove the egg with the spoon, and grasp it from above with a paper towel. DO NOT drop the egg from the spoon into your hand, as this will spill dye into your hand (and is a waste of dye).
Gently dry the egg with a paper towel.
Remember, the dye sequence is from light to dark. Do not leave the egg in any dye too long, or the dye will begin to seep under the previously applied wax and ruin the egg.
If the color hasn’t taken in five minutes, the shell is bad, and it probably won’t. (Exceptions: brown eggs have a shinier shell, and may take longer to dye. Also, sometimes the final color may take a few extra minutes to get an even, dark coat.) Leaving an egg in too long risks seepage of dye under the previously applied wax, and scoring/etching of the shell by vinegar.
Duck eggs, I am told, are a special situation. They have a smooth, glassy-looking shell, and a reputation for being hard to dye. Often duck eggs will take dye only feebly, giving a pastel result rather than rich, vibrant colors. Several suggestions that have been given me to improve the dyeability of duck eggs:
1.DO NOT vigorously wash or scrub duck eggs. This will ruin the cuticle, scratching it up and making the dye take poorly.
2.DO NOT use soap to clean duck eggs, just them gently with water only.
3.DO NOT soak duck eggs in vinegar before dyeing (or ever)–the duck egg cuticle is easily damaged by vinegar or any other acid.
4.DO soak the duck egg for several minutes in water before dyeing; this will hydrate the shell and help the dyeing process.
5.DO use multiple dips into the dye, with drying between dips, to get fuller color
_________
1.Mold should be strained from the dye by placing a piece of paper towel or coffee filter into a sieve and straining the dye through. Afterwards, you might want to bring the dye to a boil to kill any remaining mold. You can do this by pouring the dye into a saucepan and bringing it to boil, or by microwaving it (make sure the dye is in a microwave-safe container, and the lid loosened). Once the dye has cooled, add vinegar (one or two tablespoons) and use.
A piece of paper towel can be turned into a filter by folding it in half and then in half again, and then opening just one small segment of the folded towel.
Quite frankly, dye is cheap, and I usually with throw out a badly moldy dye and just mix up a new batch.
2.Precipitates should be treated similarly to mold, although I would skip straining and go straight to boiling. If the crystals don’t dissolve after the dye has been boiled (and most will), it might be worthwhile to strain the cooled dye before using.
Keep in mind that dye molecules can react with something in the water to fall out of solution by compounding with them. If heating does not cause the particles to re-dissolve, this may be the case. The remaining liquid will then dye poorly, and should be thrown out and replaced.
I have found this to be an issue with some of the newer dyes, and with UGS Gold.
Back to Main Dyeing page
Back to Main Pysankarstvo page
Search my site with Google
Dyeing the pysanka