Snowflake Pysanka
Step-by-Step: Two-Tone Dyeing
Snowflake Pysanka
Step-by-Step: Two-Tone Dyeing

Not all eggshells are perfect. While most eggs will take dye evenly, and give lovely results like those on the previous page, others, when dyed, will be found to have scratches, abrasion rings, or areas with poor or uneven dye adherence. When making ordinary pysanky, these are the eggs I would dye black, as black will dye just about any egg well.
But black pysanky just don’t make very nice ornaments, so another solution is needed for these injured eggs.
The two most common problems appear to be abrasion rings and uneven adherence of the dye. Abrasion rings are caused by the machines used to wash and clean eggs; the eggs are rolled on roller bars while they are being washed, and the cuticle becomes scratched and damaged. The result is two–or more–light colored circumferential rings that can be seen after the egg has been dyed. They are slightly visible on this egg:
(If the dye had been darker, the rings would stand out much more prominently.)
Other eggs just don’t take the dye very well (pale colored), have one or two bad spots, or dye in a blotchy, uneven manner.
Unfortunately, problems with the cuticle of the egg cannot be easily discovered before dyeing. Once a snowflake has been written in wax on the white egg, a snowflake pysanka is pretty much complete. Since we can’t fix the cuticle, we need a finish that can mask the problem (but still look nice).
It has been my experience that, when I’ve washed the dye off of a pysanka with soap or detergent, subsequent dyes don’t take very well, and usually adhere in a mottled, pastel fashion. In the case of light blue, the result is a really nice pastel blue finish. Other blues, as well as purples, greens, eggplant, and magenta, also give nice results when used in this fashion.
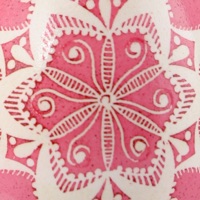
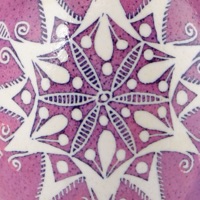
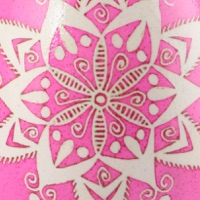
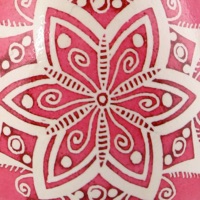
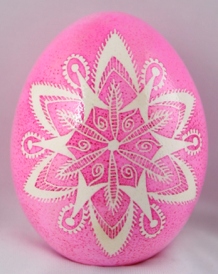
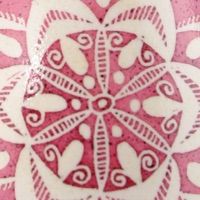
Another thing I have found is that it is difficult hard to wash off the dye completely, especially around the waxed areas. Rubbing too vigorously can cause fine wax lines to come off. However, I found that I could turn this to my advantage: those areas near the wax lines would remain a bit darker, and give a two tone/contrasting effect, making the snowflakes pop out more from the background. You can see that in this pink egg:
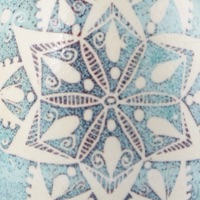
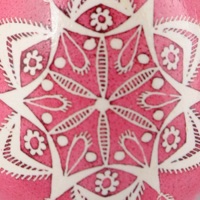
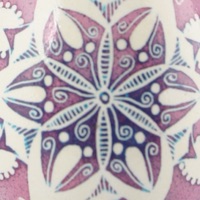
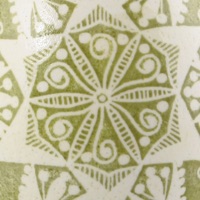
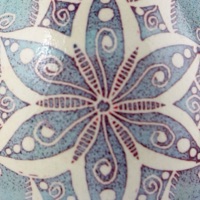
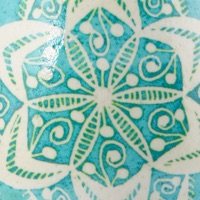
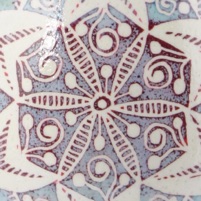
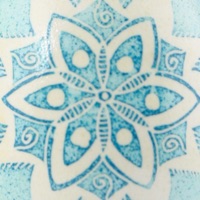
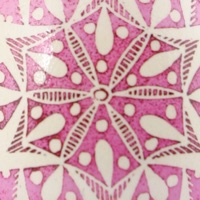
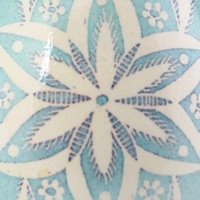
I soon realized that not only could I take advantage of a light/dark contrast, but that I could use using different colors to get an even more pronounced contrast. The contrast to in hue and tone shows off the fine details of the snowflake even more pronouncedly. Two shades of blue will give a nice effect, but so will pink on blue and vice versa.
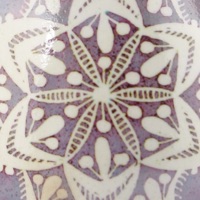
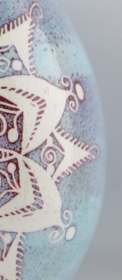
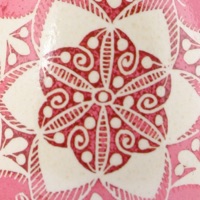
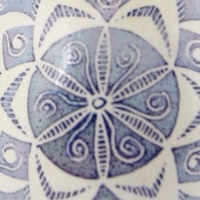
Shown here (and at the top of this page) are details of the two-tone effect from some of my 2010 snowflake eggs:
TECHNIQUE: Getting a mottled, two-tone finish is fairly straightforward. First you need to remove the original color; Simple Green or Mrs. Meyer’s all purpose cleaner works well for this step, as does Ivory liquid (dish) soap. I spray the Simple Green/Mrs. Meyers onto the egg, drenching it, and let the egg sit for a minute or so. If using dish soap, I rub some on, let it sit for a bit.
I then take a sponge (the non-abrasive side of a Scotch-Brite sponge in my case), and remove the dye by gently rubbing it, rinsing with tepid water occasionally. I rub gently around the waxed areas, allowing some color to remain there. DO NOT rub too vigorously; doing so can remove fine wax lines from the egg.
Another option is to use a Magic Eraser; wet it thoroughly, and rub the color off in a similar fashion.
After the color has been removed to your satisfaction, rinse off the egg well (until it no longer feels slippery), dip is briefly into vinegar, and then dip into the final dye bath. Leave it in until the desired color has been achieved, and then remove and gently pat it dry.

Back to MAIN My Pysanky page.
Back to MAIN Snowflake Pysanky page.
Search my site with Google
Dyeing your snowflake pysanka: Two-Tone Finish