Before Waxing

Before you begin applying wax to your egg, there are several things you should check and do.
1. Select a Pattern
Unless you are going to make up a design as you go along, it is best to have picked out a pattern in advance, either from a pysanka book, design sheet, photo, or another pysanka. This will give you some idea of what colors you will need, and should make sure you have those dyes ready. (My design sheets can be downloaded here and here.)
2. Check the Egg
Wax should only be applied to an egg that is clean, dry and (if full) at room temperature. If it has been dyed, the dye must have dried completely. Why? To assure proper adherence of the wax.
If an egg has foreign matter on it, whether galline, human or industrial in origin, there will be problems with the wax sticking, because if it is only attached to a bit of crud (rather than the shell itself), this wax will come off when the foreign matter does. This is one reason eggs should be carefully inspected before using, washed, and inspected again. It is also a good reason to keep your hands clean and dry when writing pysanky, and wear white cotton gloves if can’t for some reason (e.g. lotion on hands, sweaty palms).
If an egg is damp, the dye can’t adhere properly either. The wax does not bond to water, only to the shell itself. As with a cold egg, the wax may flake off later, either in a dye bath, or in your hand as you are working.
If an egg is cold, the wax will cool much more quickly, and may not adhere to the shell as well as it should. I suspect, but don’t know for certain, that this is because it does not flow into the micropores of the surface as deeply. This wax may later flake off, coming loose in your dye baths, or even flaking off in your hand as you work. Additionally, a cold egg may “sweat” (condensation of moisture from the air), giving you two reasons for the wax not to adhere properly.
Eggs should be at room temperature, NOT fresh out of the refrigerator; warming them in a bowl of warm water does not heat them up properly, and should only be used as a last resort. Luba Perchyshyn recommends that eggs be left out for two days after refrigeration before working on them, but two hours will do in a pinch. If the eggs have condensation on them, they are NOT ready for use.
You can test the dryness and temperature of the shell by holding the egg gently to your cheek, or to the skin just above your upper lip:


If the eggshell feels cold and clammy to touch, it is still damp, and not yet ready to write on. If the eggshell feel cold to the touch, it is not ready to write on. If, however, the eggshell feels smooth and relatively warm to touch, it is ready to be written on.
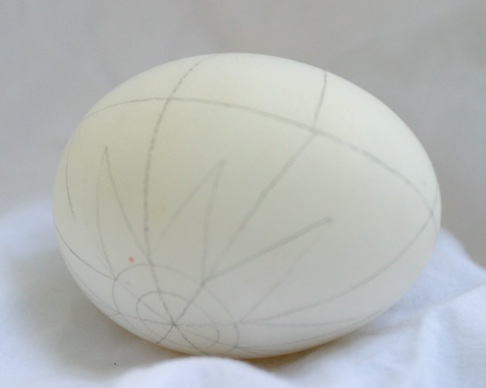
3. Pencil Lines
You should have drawn on all of your guide lines before beginning to wax the egg, unless you are planning to make the egg completely freehand. Read the appropriate sections for information about pencil lines, divisions and motifs.
Once you have completed these steps, you are ready to begin writing with wax. On the following pages you can read about stylus selection (which tip width do you need?), how to write with various types of styluses, waxing techniques, and how to create drop-pull pysanky and krapanky. Or at least you will be able to when I finish writing..........

Back to Main Wax Lines page
Back to Main Pysankarstvo page
Search my site with Google
Prelude to Wax Application