Pysanka-Making Supplies:
Additional Supplies
Pysanka-Making Supplies:
Additional Supplies

Luxuries in the age of Fragonard
Additional Supplies:
There are many other items that are useful and quite helpful, not exactly luxuries, but not absolutely necessary for a beginner.
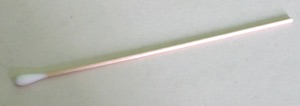
Q-TIPS. These are useful for applying dye to small areas of the egg. A small brush may also be used for this purpose. This technique is most often used for applying small amounts of green or blue to a pysanka. It avoids having to dye the entire egg green, and then having to rinse it, just to obtain a few dots of green.
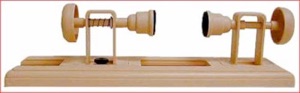
There are several types of lathes available. The one shown here is a simple plastic craft lathe, and can be purchased from any pysanka supply house, as well as craft stores like Michael’s for about $25 (US). There are also much fancier egg lathes available, made of metal, at a much higher price. Many pysanka artists swear by them, as they allow you to make even longitudinal divisions as well. I’ve managed to do this well enough by using my simple lathe and Egg templates (see below).
For instructions on using a lathe, look here.
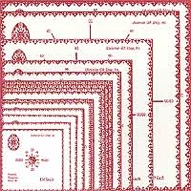
By putting one on top of a pysanka, I could draw marks which would divide the egg evenly into four, six, eight or more divisions. If I put one on the side of a pysanka, I could draw a circle, and make the divisions, allowing me to make perfectly symmetric four, six or eight pointed stars or snowflakes!
I keep a set of these in my workspace, easily accessible, and find that I use them all the time. For more information on using templates, look here.
(These templates re made by the Ukrainian Gift shop and sold by most pysanka suppliers.)
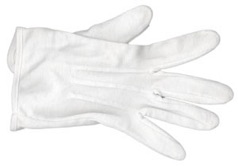
WHITE COTTON GLOVES. It is important, while working on an egg, to keep it as clean as possible. Some pysanka artists do this by wearing white cotton gloves. The glove keeps any lotions or natural skin oils off of the egg, where they might affect dyeing.
I don’t like wearing gloves much, especially when doing fine work, but have found these gloves to be useful none the less. When I am working on pysanky, I invariably get dye all over my hands; this can be transferred to light colored eggs while holding them. So, if am working with dyes, I wear a glove on my left hand, the one I hold the pysanka with.

GOOF OFF WIPES. The best thing since sliced bread.......but no longer produced or sold. (I am keeping an eye out for a replacement.) These are reusable wipes with a water-based soapy component. They are brilliant at removing pencil marks from a white egg. I find these invaluable in classes, and when writing my own pysanky, especially those slated to have a light background. A wipe with one of these before the first dye bath removes all extraneous pencil lines quickly and simply. What’s not to love?
STYLUS HOLDER. What do you do with a stylus when you’re not using it? In my classes, I have my students rest them on the edge of the glass candle holder. If you leave it on the wax or on the table (covered with paper of some sort), the stylus, as it cools, tends to stick, or even get embedded in the wax. Trying to remove a stylus from a cake of wax can damage it.
What to do? An elegant solution, if you are using multiple styluses, is a stylus holder:
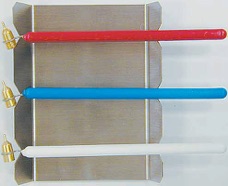
This holder is produced by the Ukrainian Gift Shop.
Even more problematic is the usage of multiple electric styluses, with their multiple cords. UGS has produced a stylus holder for electric styluses as well:
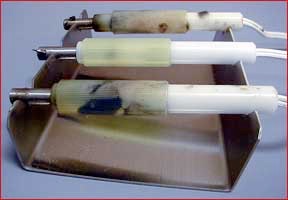
This is useful if you have a small number of styluses. If you have more than three, a custom-made wooden stylus holder can be considered.
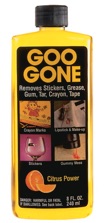
My current favorite is Goo-Gone, an organic solvent that smells pleasant and citrusy, but this doesn’t mean that it does not have toxic fumes. It is also combustible. It works a bit more slowly than the others. Make sure you get the type in the squirt bottle, not the variety that now comes in a spray bottle (and which appears to be a water-based spray cleaner)! It can be bought in American Dollar Tree stores in a small bottle, perfect for taking to classes; rather than removing the foil covering the opening of the bottle, poke a pin though it and you’ve created a mini squirt bottle!
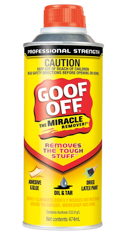
A former favorite is Goof Off, which is a blend of organic solvents including toluene. It is quite good for getting off residual wax. Disadvantages of Goof Off include its volatility, its inhalant abuse potential, and flammability. If the liquid is kept away from an open flame, it should not cause any problems. It should be used in a well ventilated area. I have a small amount in a squirt bottle that I use for secondary cleaning.
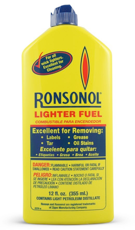
Ronsonol lighter fluid is another popular wax remover. It is a mix of “light petroleum distillates,” and does a decent job of lightly removing residual wax and soot from an egg. Ronsonol seems to be the most expensive solvent of those commonly used in pysankarstvo.
Other pysankary have noted that they use naptha (a lighter fluid) The former can have a very toxic effect on red blood cells, and its benzene component is a powerful carcinogen; Remember, make sure any solution you use is NOT water-based.

Avoid “marine” or “spar” varnishes (they yellow tremendously), or any water-based varnishes or shellacs (they will wash the dyes off of the egg and ruin it).
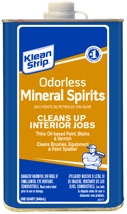
A small can will last the normal user for years and years–unless it dries up. With frequent opening and closing of the lid, it gets dented, and the seal becomes less tight over time. As this happens, the varnish will begin to dry out and thicken. It can be thinned with a bit of mineral spirits, but it is best to buy in small quantities and avoid this problem.
Once the varnish thickens up and becomes deep yellow, and forms solid sheets across the surface, it is best to dispose of it. It is tempting to keep using it, but the results may not be good–thick lumpy layers of wax, and a yellowed surface. It’s best to spend the $5 rather than risk ruing the pysanka you have put hours of work into.
The Diamond Varathane that is recommended by Helen Badulak is no longer in production, and she no longer sells it on her site. All the polyurethanes yellow eventually, although some do so more quickly than others. I have switched to the Varathane brand from Minwax, as I am told it yellows less. We’ll have to see how that goes.
You can read more about varnishes here.
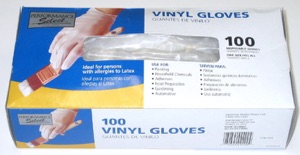
VINYL GLOVES. I use these to apply varnish to my pysanky. Latex gloves, while nicer fitting, should not be used, because most varnishes will dissolve them. These can be purchase at any drug store or hardware store. Most women will wear a medium glove; smalls are for children or people with tiny hands.
DRYING RACK. This can be purchased or made. It is necessary only if you wish to varnish your pysanky. A single egg can be dried on a simple rack made from a piece of cardboard with three thumbtack pushed through it. If you wish to dry several eggs at a time, you’ll need a larger, more professional rack.
A more professional rack can be made from a piece of plywood and nails. The nails are either driven through the plywood, or pushed through holes made with a drill. The nails should be in circles of three or four, with the pointed ends up towards the egg.
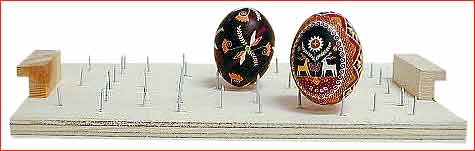
A commercially made egg rack available from the Ukrainian Gift Shop
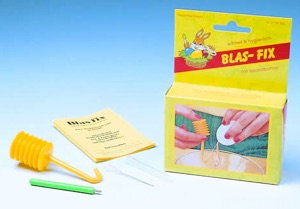
It has everything you need–there is a small hand drill, which easily makes perfectly-sized holes; no need to use a Dremel tool or other device, as I used to. And it is a one hole blower, so you need put only one hole on your egg.
The small yellow bellows has a hollow (and dull) needle which attaches to the elbow; it is placed into the egg, and air is pumped in. The egg white and yolk rush out around the needle.
The only drawback is that the bellows is made form a very cheap plastic that wears out quickly, and develops holes. Air leaks out, and it becomes harder and harder to pump. There are two solutions to this problem. One is to buy an aerosolized plastic and spray it over the bellows, to seal it (I’ve not done this, but have heard tell it is effective); use the spray plastic meant to be sprayed onto surfaces to “rubberize” and make them grip better.
The other solution is to replace the bellows (but leave the curved yellow tubing) with a stronger plastic glue applicator. These are used in carpentry, an dare quite cheap. You need to make a hole in the far end (to allow air into the bellows; this can be done with a heated nail), and glue or tape it into place:
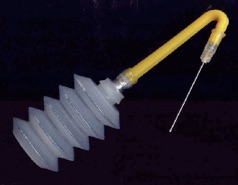
This technique was pioneered by Karl of the Eggs-Pysanky Yahoo group, and the photo is his. Since I did this, I haven’t had to replace another Blas-fix! (The carpenter’s glue applicators can be purchased at Lee Valley.)
Back to Main Supplies page
Back to MAIN Pysanka home page.
Back to Pysanka Index.
Search my site with Google