Teaching Pysankarstvo:
Didactic Information
Teaching Pysankarstvo:
Didactic Information

While you could simply put out supplies and let your students start writing pysanky after a brief “how to” talk, I like to present some background material along with the technical instructions. To me, pysankarstvo is not just a craft, like rubber band bracelets or decoupage, but a folk tradition with a long history. A bit about that should be included in any class.
Just how much didactic background material you can present depends on the age and attention span of your students, what previous experience they’re had, as well as the time you have allotted for class.
When teaching older students and adults, I like to present some history of pysankarstvo (including folk beliefs and talismanic uses), and an explanation of the symbolism (and their evolution over time), time allowing. If I have the opportunity, I will try to do so with the younger students, too, but in a more abbreviated manner. Adults and children find our old customs and traditions, as well as the pagan pantheon, fascinating.
I have created a Powerpoint presentation that covers the following topics:
Definition of a pysanka
Types of decorated Slavic eggs
Slavic nations and their decorated eggs
Folk vs. modern pysanky
Pysanka folk traditions
Symbols and Motifs
I pick and choose which sections I will use depending on the intended audience, their attention span, interests and ethnicity, and the available time.
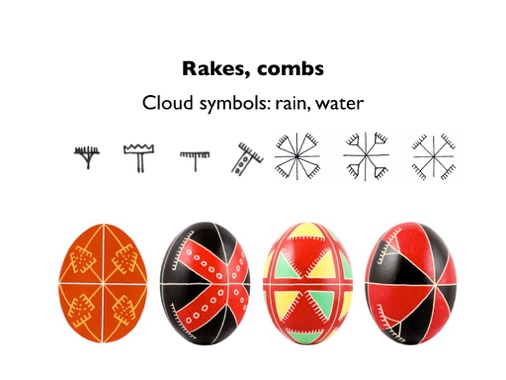
This is a sample slide from the Symbols and Motifs section:
You can download the complete presentation here: Pysanka Talk 2019
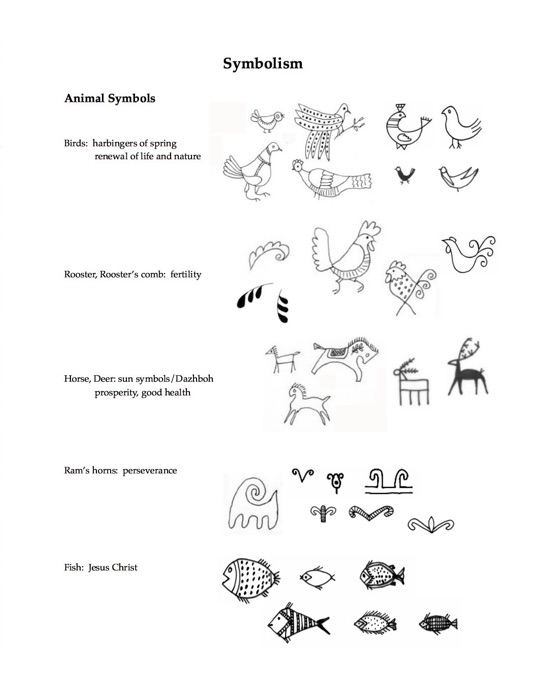
I also find that posters or even a small flip chart with illustrations of the symbols can be quite helpful here. I will hang symbols around the room, and make symbol sheets available to those interested. My Kids’ Booklet has several pages of symbols, which many of my students find useful, and use when creating their own designs. A sample page is shown here:
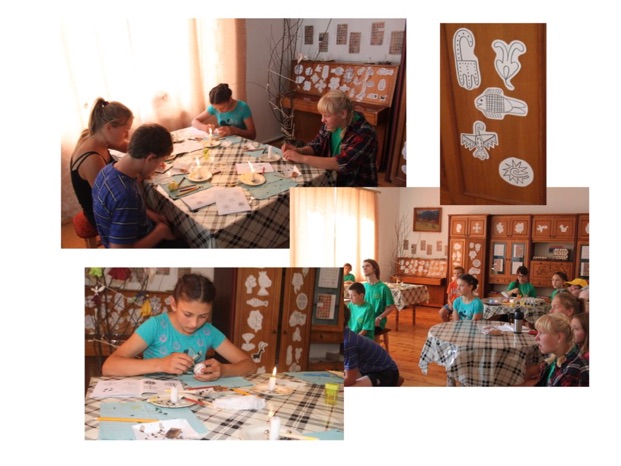
As for the symbols, in recent years I have been drawing them freehand on white printer paper with Crayola markers. I thin cut them out, and hang them around my “maysternia” (studio). I do this at camp, where I have a dedicated work space, and where I have the same students for several sessions over a two week period. I take the symbols directly from the pysanky in Vira Manko’s “Ukrainian Folk Pysanky” book; I also hang plates from the folio version around he room, as seen in this photo collage:
The younger students also find pysanka legends to be interesting, so I might include one or two of those. There are several included in the handout, and on the pages here.
For information and suggestions on more practical pysankarstvo instruction, proceed to the next page.
Back to Main Teaching page
Back to Main Pysankarstvo page
Search my site with Google
Pysanka Show and Tell